Create your first UITableView
Let’s take a look at how UITableView’s are made in code.

To use a UITableView in your project, first we have to create one. We do this on line 16 in our createTableView function by calling a UITableView initializer and naming the UITableView we get back myTableView. By default our table view has no size. On line 17, we give it a size and specify where in its parent'92s view it will sit by setting the frame property.
let myTableView = UITableView()
myTableView.frame = CGRect(x: 0.0, y: 0.0, width: 250.0, height: 500.0)
Online 18, we set the dataSource property of our myTableView object to be self. This means that "self" - the instance of MyViewController that this code runs in - will be the instance that provides myTableView with the content it is to display. In other words, self will be the source of myTableView's data. In order for a UITableViewDataSource to work correctly, we must conform to the UITableViewDataSource protocol and implement all of its required methods. We will come back to this shortly.
myTableView.dataSource = selfline 20, we add our UITableView as a subview of the view controller's view. Without this line, myTableView would be setup but would never appear on screen.
view.addSubview(myTableView)We conform to the UITableViewDataSource protocol by implementing two functions, the first of which is tableView(_, numberOfRowsInSection). By returning 25, we say that our table view will have 25 rows in each of its sections - by default there is only one section.
func tableView(_ tableView: UITableView, numberOfRowsInSection section: Int) -> Int {
return 25
}
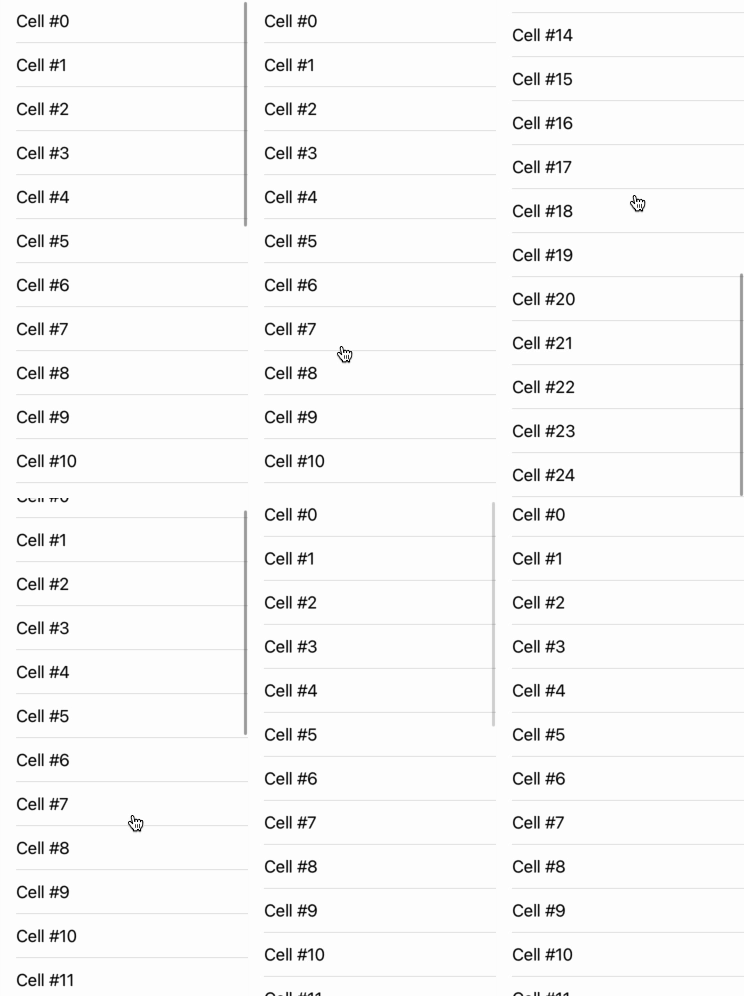
The second function we have to implement as part of the UITableViewDataSource protocol is tableView(_, cellForRowAt indexPath). We do this on lines 27 through 31. This function will be called for each row in a table view and returns the cell that is to be displayed there. On line 28, we first initialize a standard UITableViewCell and call it cell. On the next line we use string interpolation to set the text of the cell via the text property on its text label. The cell will display the word Cell followed by the number row that it is, starting at 0. We finish this function and our role as a UITableViewDataSource by returning our cell on line 30.
func tableView(_ tableView: UITableView, cellForRowAt indexPath: IndexPath) -> UITableViewCell {
let cell = UITableViewCell()
cell.textLabel?.text = "Cell #\(indexPath.row)"
return cell
}
Creating a new cell every time in tableView(_, cellForRowAt indexPath) is acceptable for a very small number of cells but it becomes inefficient when you want a large number of cells. In the case where you want to use a lot of cells, calling the dequeueReusableCell(withIdentifier: for:) function and reusing already made cells is the way to go.
let cell = UITableViewCell()Full Code
import UIKit
import PlaygroundSupport

class MyViewController : UIViewController, UITableViewDataSource {

    override func loadView() {
        let view = UIView()
        view.backgroundColor = .gray
        self.view = view

        createTableView()
    }

    func createTableView() {

        let myTableView = UITableView()
        myTableView.frame = CGRect(x: 0.0, y: 0.0, width: 250.0, height: 500.0)
        myTableView.dataSource = self

        view.addSubview(myTableView)
    }

    func tableView(_ tableView: UITableView, numberOfRowsInSection section: Int) -> Int {
        return 25
    }

    func tableView(_ tableView: UITableView, cellForRowAt indexPath: IndexPath) -> UITableViewCell {
        let cell = UITableViewCell()
        cell.textLabel?.text = "Cell #\(indexPath.row)"
        return cell
    }
}

PlaygroundPage.current.liveView = MyViewController()
* This article originally appeared in the ZipTips app.
